
Appearance
Search Mode
This mode requires that you have at least one model enabled (via Welcome Wizard, or Settings) and performed at least one analysis. You can also activate this view by pressing F3. If you want to activate this view and directly focus on search input, press Ctrl + E (Windows, Linux) or Cmd + E (macOS). You can also use Ctrl/Cmd + 1..5 to switch to this mode and set the search type, then focus on the search file in one key combination.
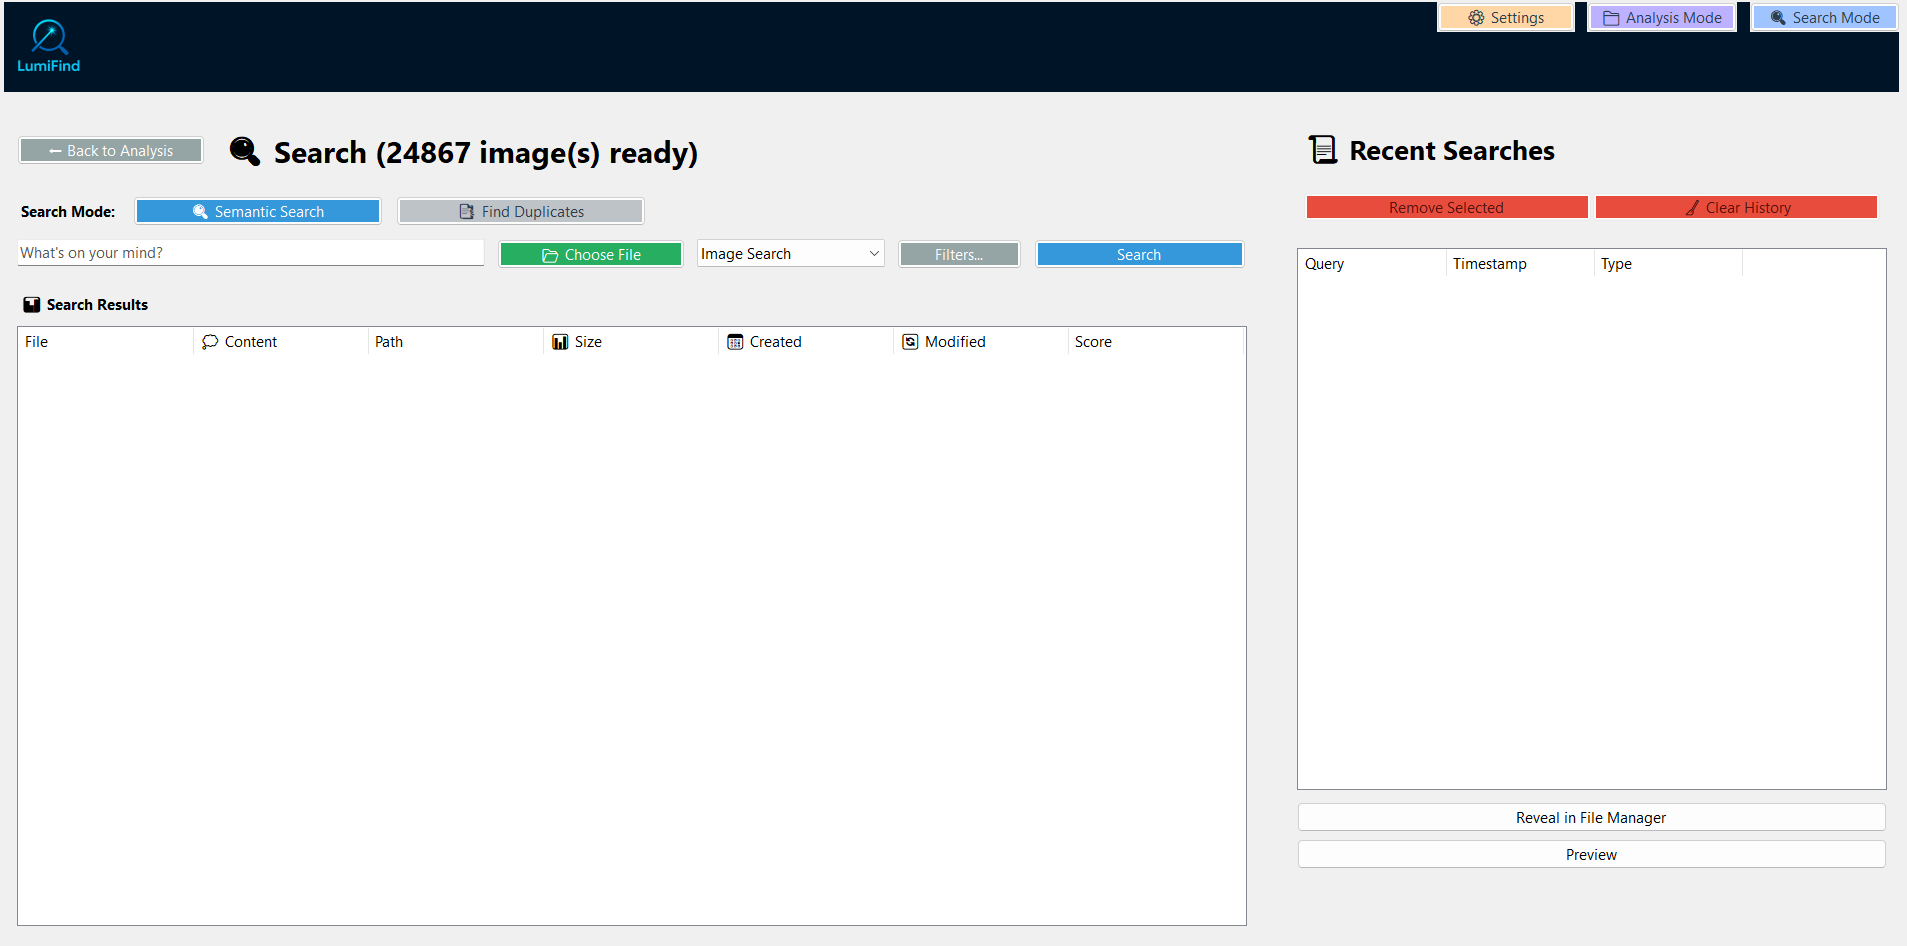
Upon the next launches, this mode will open by default, making your searches one click faster.
After LumiFind is ready, type the query you want to search for and select the type of search. Depending on your edition and the active models, only the available options will be shown. You can choose from the following options:
- Document Search
- Image Search
- Voice Search
- Video Audio Search
- Video Frame Search
You can also switch the whole Search Mode to Find Duplicates using the mode buttons at the top. In that mode LumiFind looks for copies of a selected file or scans the whole library for duplicate groups. See Find Duplicates for details.
Before running a search, you can refine the scope using the "Filters..." button.
Using Filters
Here you can:
- Include or exclude specific folders
- Include or exclude file formats for the active search type
- Adjust path-related options
- Apply search-related settings directly within Search Mode
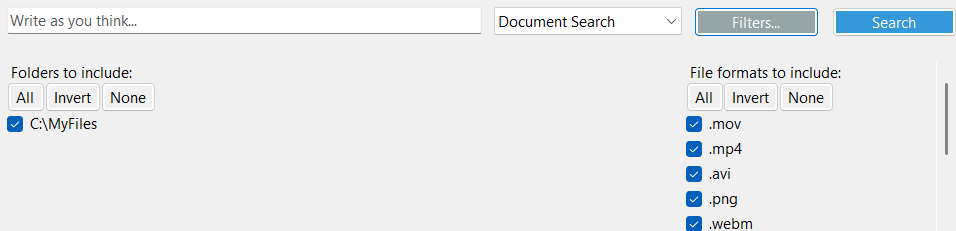
Changes in the filter section are stored. This means you do not have to change them each time. However, folder selection applies only to the current search. Below each setting is explained:
Detail Level
Specifies the depth of search for files.
- Metadata and Content (default): Searches both metadata (e.g., file name, creation date, or other file properties not related to the actual content, similar to the operating system's search) and the file content itself using the selected model. Metadata mode will also search within the EXIF data of an image if exists, such as GPS coordinates and camera. So searching for a country or city may also give results.
- Metadata Only: Searches only the file's metadata without considering the content, only file name, the path, and EXIF data are considered. This mode does not require any AI model to be enabled, so it can be used even when all models are disabled.
- Content Only: Focuses solely on the file content, leveraging the model for deeper and more intelligent search results. Metadata will be ignored. For example, if a file is named
abc.txtand you search for "abc", the file will only be found if the term "abc" or semantically related content exists within the document. If not, it will not appear in the search results. Similarly, a partial path name can also be searched if you are actually looking for a folder.
Max Results
Defines the maximum number of results that can be displayed in the result window. Increase it if the results are not satisfactory. Default: 100
Max Image Results (Pro Edition)
Determines how many top-matching images will be displayed for each image search query. Default: 10
Max Results Per File
Sets the maximum number of search results shown per individual file. For example, if a document is identified as an 'invoice' across multiple pages, this setting controls how many times it will appear in the results. Default: 1.
Oldest File
Specifies the oldest file to include in search results. This setting affects search only, not indexing. For example, if you indexed files from the last 5 years but want to see results only from this year, select a date using the date picker. On Linux, the date must be entered manually in YYYY-MM-DD format. Default: 1970-01-01.
See Analysis Settings -> Oldest File for specifying date for analyses.
Result Min Score
Specifies the minimum relevance score a document, voice, video audio, and video frames must have to appear in search results. Lower scores may include less relevant results and higher scores may end up not showing any files at all. Default: 0
File Size Limits
Sets the minimum and maximum file sizes that LumiFind will display in the search results. Files outside this range will be ignored. Default is between 0 and 100 MB.
After adjusting filters, click "Search" to run the query with your selected configuration, or press Enter.
Performing Search
After starting the search, results will appear within seconds if matches are found. For Document, Voice, or Video Audio results, the Content area displays the relevant text. If it is not clearly visible, you can resize the columns by dragging their borders.
For the image results, no content is displayed in the Content area. Instead, selecting an image result once will show a thumbnail in the bottom right of the window if thumbnail generation is enabled in the Settings -> Analysis Settings -> Enable Thumbnail Generation during analysis and the Visual Settings -> Display Thumbnails in Search Results is set to Yes. Depending on the settings and availability, either "Thumbnail" or "Original" message will be shown above the image to indicate its source.
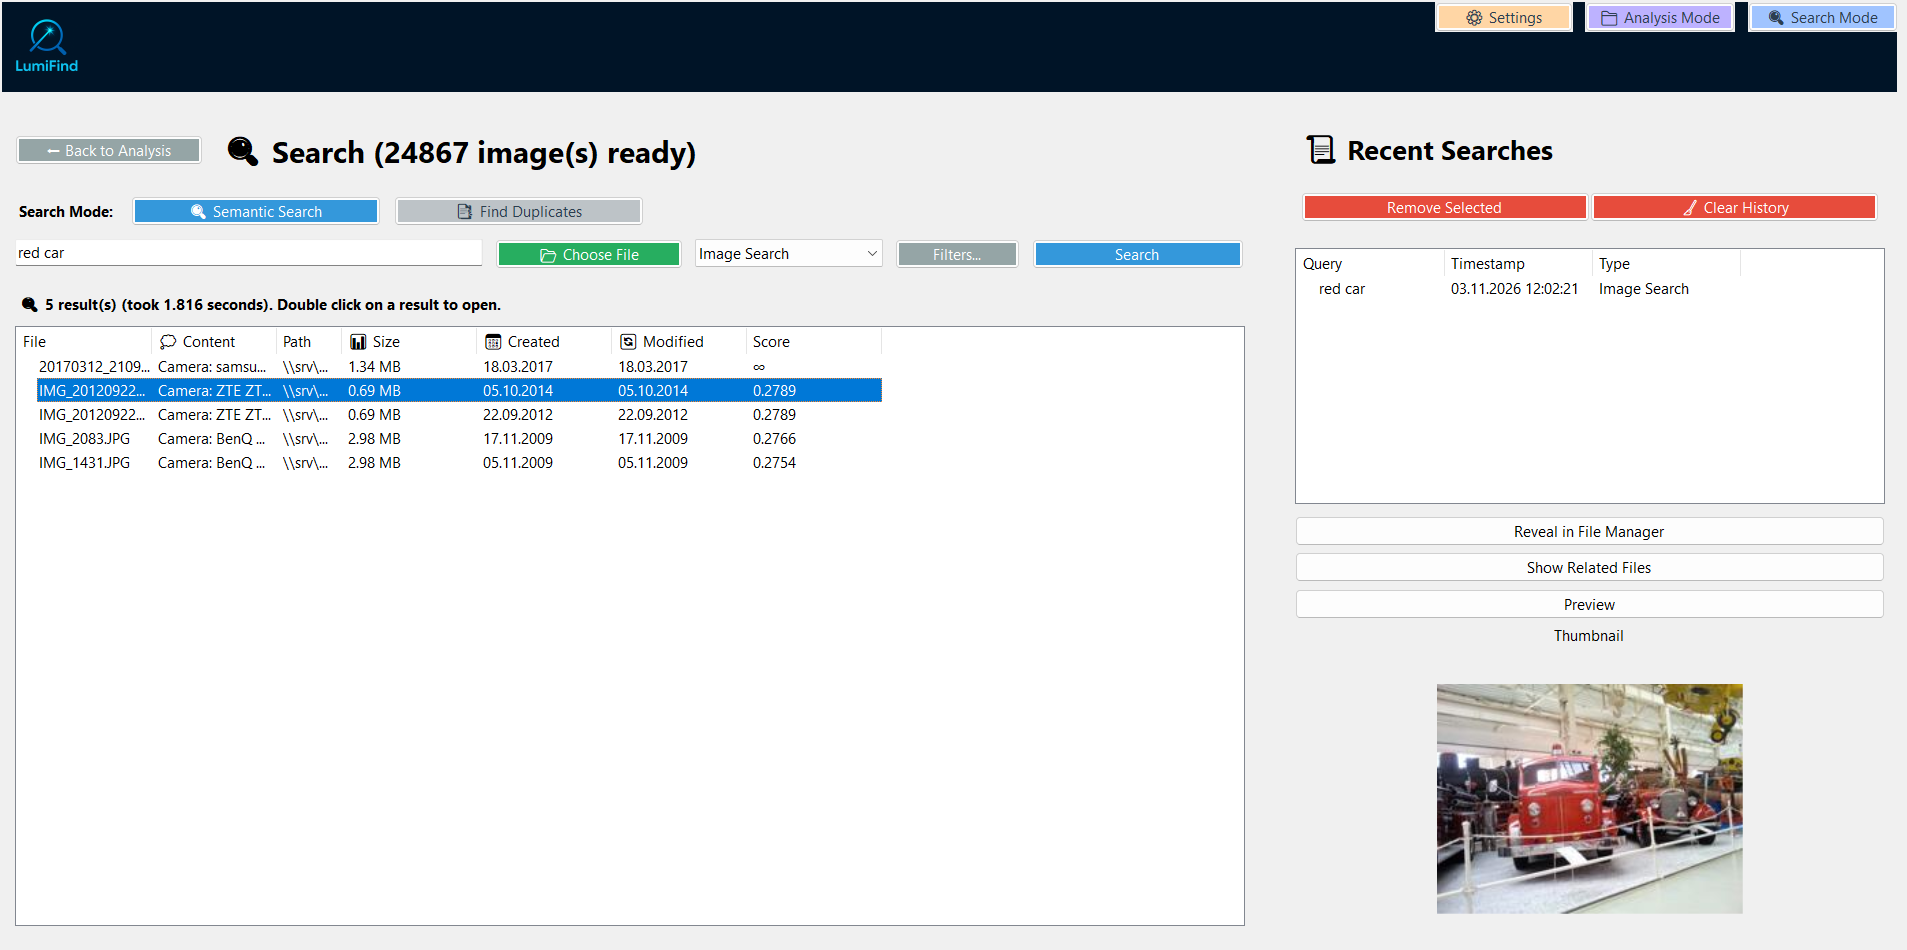
Each search is saved in the Recent Searches area on the right. The time of the search and the type of search will also be displayed. You can double-click a search query to run it again, delete a single entry, or clear all entries.
For all files, you can use "Reveal in File Manager" button to locate the file in the file system using the default file browser.
Double-clicking a result will open the file with the default application associated with that file type on your system.
"Show Related Files" opens a new dialog that lists files semantically similar to the currently selected file. See Find Related Files for details.
While this dialog is open, it is also possible to view other files by single-clicking. Double-clicking will start a relevance search for the selected file.